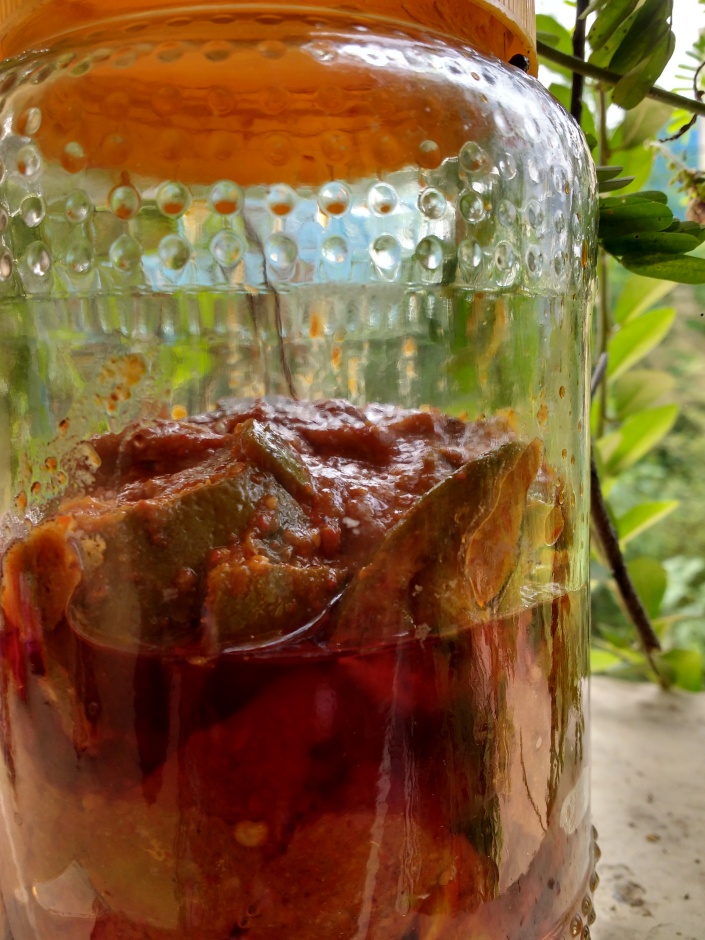
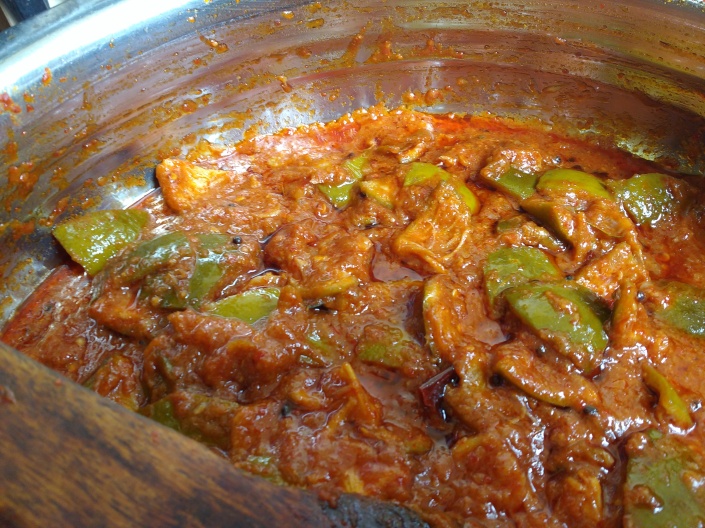
Citron ( Narthanga) Pickle
It’s been long since I posted anything in this blog. Things tend to happen in life which makes you too busy without giving time and space for yourself. Bringing new member in my family which transcend me from a women to a mother is the most precious thing that ever happened in my life. My full time routine now revolves around my son 🙂 . My palate for food changed a lot since my pregnancy, I am carving more of tangy and spicy food. I need not mention how my sweet tooth hit the top notch during my every trimester. Recently I bought Citron from market with an intention to make some pickle for my husband. Mom made this Citron pickle, I first had this in Nagercoil marriage feast. It has a tangy sweetness with the right amount out spiciness. Despite the fact that it is made for my husband, I am relishing it with every bite of it. I don’t know whether it will last long enough for him, to come home.
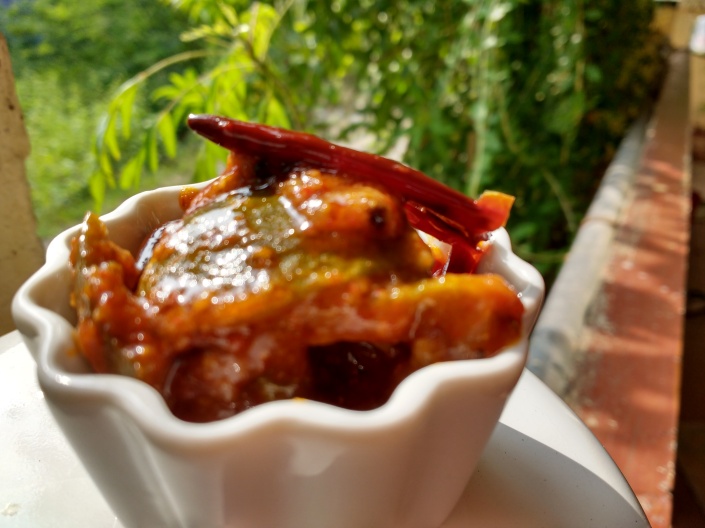
Citron Pickle
Citron- 1/2 kg
Dried Red chilies- 250 gms
Coriander pwd- 1/2 tsp
Salt- as per your need
Tamarind- Lemon size
For tampering
Fenugreek powder- 1/2 tsp
Mustard seeds- 1 tsp
Curry leaves- 3 springs
Dried Red chilies- 4 no
Asafoetida -[Hing)- 1 tsp
Gingelly oil[ sesame oil]- 250 ml
Jaggery- 5 to 6 tsp
Method
- In a pan, boil whole citron with water for 10 minutes, Cut the boiled citron into small piece.
- In a kadai, pour Gingelly oil, add in all the tampering ingredients one by one.
- Add in the citron slices, red chilli powder, coriander powder and salt. Mix it well.
- Finally add the tamarind water let it cook until the oil floats on top of it.
Serve it with curd rice or sambhar rice….
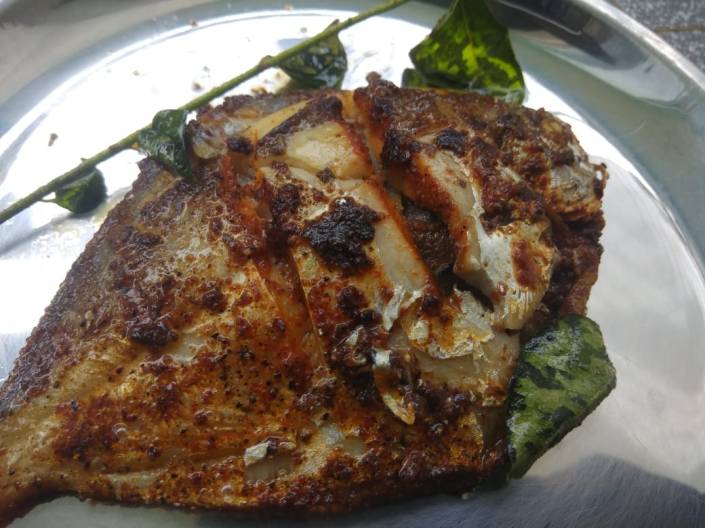
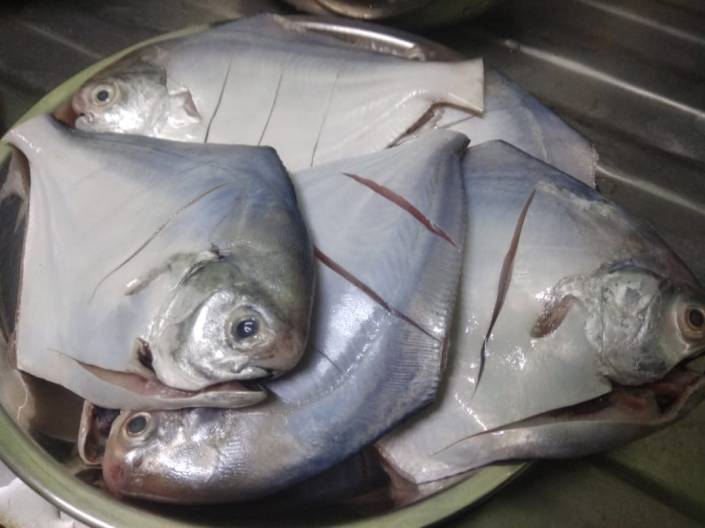
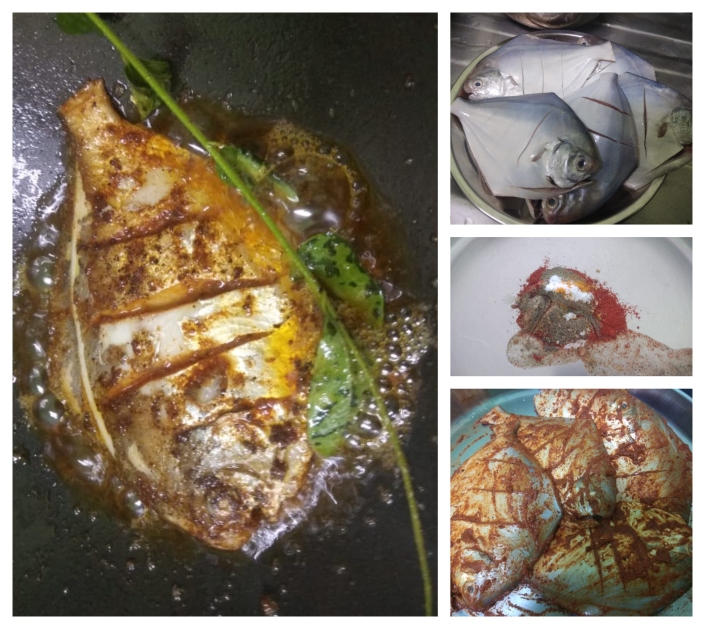
Pomfrat Fry
As the dasara festival is hitting its farewell, we are being in home hit by flu one after the another almost everyone got affected by one or the other kind of viral infection. Even the hospital here is over flown with patients. My uncle advised us to visit Mysore Dasara Festival as it is really famous and well known here, to no avail we havn’t stepped out of our home for days. Today I am gonna post Pomfrat fry recipe. I have started eating pomfrat only after I came to Bangalore as we don’t find these kind of fishes neither in sivakasi nor in Nagarcoil (to my knowledge I havn’t found this in Nagercoil fish market). This is the second recipe I tried after trying it for the first time in curry form .Actually this fish tastes good only when you fry it, when I made gravy with it the skin feels slippery and it is not at all appetizing. So here is the recipe
Ingredients
Pomfrat- 1/2 kg
Black pepper powder- 1tsp
chilli powder- 1tsp
Turmeric Pwd- 1/4 tsp
Coriander Pwd- 1/2tsp
lemon- 1no
Salt- as required
Method
1. Mix all the masala ingredients, squeeze in the lemon juice and add in salt and make it into a paste.
2. Rub the masala paste on the fish and let it marinate for 30 minutes
3. In a fry pan, add oil and fry the fish until it gets cooked.
Note-
Adding curry leave to the oil will enhance the flavour of the fish.
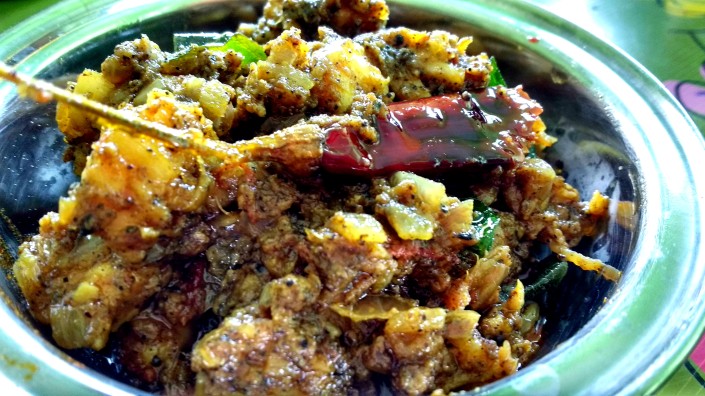
Prawns Pepper Fry

It’s been a year since I posted any post in my blog. yup things happened and I got married and moved to Bangalore with my Husband. I won’t cook on a daily basis before marriage but after marriage I turned out to be a full time cook. I find myself amused at doing things and fitting myself in managing the house work…still working on it. Today I made Prawns pepper fry and it turned out to be great. So i had this urge to post it on my blog, Finally I sat down and writing this post…Hell yeah I am doing it after a year gap. Recently, I went to Velankani with my Husband’s family and this dish is inspired from a pepper prawn fry we had at Hotel Sea Gate. To tell you the truth, that dish is not up to the mark (I found that prawns were too small for tat dish) but what made me to recreate it, is the combination of pepper with prawns.
Ingredients
Prawns- 400 Gms
Onion- 2 Medium sized (Finely Chopped)
Tomato- 1 no
Ginger Garlic Paste- 1 &1/2 tsp
Turmeric powder- 1/4 tsp
Chilli powder- 1/2 Tsp
Coriander Powder- 1/2 tsp
Cumin Powder- 1/2 tsp
Pepper Powder- 2 to 3 tsp
Salt to taste
oil
Curd- 2 dollops of curd
Dried Red chilli- 2 no
curry leaves- 2 springs
Mustard seeds
Preparation
- Clean and devein the prawns and marinate it with turmeric powder.
- In a pan pour generous amount of oil, add mustard seeds, dried red chillies and curry leaves.
- Add finely chopped onions, wait until it gets translucent in colour. Now add the diced tomatoes, wen the tomatoes turn mushy add the ginger garlic paste. When the raw smell of ginger and garlic leaves, add chilli powder, turmeric powder and a pinch of salt.
- Add the marinated prawns and cook for 5 minutes. Now add 2 dollops of curd, You can increase the curd quantity if you want it in a semi gravy condition.
- Now water oozes out the prawns, you will get a gravy condition. Add in the coriander powder, 2tsp pepper powder and 1/2 tsp of Cumin powder.Mix well.
- After a few minutes you can find all the water gets absorbed and the oil oozes out. Season it with some salt and a dash of pepper powder. Toss it well.
- Add in some curry leaves as a final touch.
Note:
You can add more curd if u want this in gravy form. Make sure that the curd you use is not too sour. If you are using sour curd reduce the tomato quantity in order to balance the tangy flavour.
You can add more pepper powder and chilli powder it is purely depends on your spice tolerance. My suggestion would be use less amount of chilli powder and use more of pepper powder.
Don’t add too much coriander powder, pepper is the queen of this recipe. coriander powder act as a binding agent, it gives consistency to the gravy. Too much of it would literally ruin your dish.
In this recipe I diced the prawns into two pieces so it will get coated well with the masalas.
Serve it with hot steamed rice and Tomato rasam.
Paneer Tikka

Serves 4
Paneer- 200 gms
Capsicum- 1 large
Onion- 1
Tomato- 1
Marinade
Curd – 1/2 Cup
Turmeric powder – 1/4 tsp
(or)
a pinch of orange food colour
Oil – 2 tsp
Cornflour – 1tsp
chicken masala- 1tsp (or) Tandoori masala
Chilli powder- 3/4 tsp
Ginger & garlic paste- 3/4tsp
salt- 1/2 tsp
dry mango powder – 1/2 tsp ( Optional)

Method
1. Hung the curd in a muslin cloth for 15 minutes & drain the water content.
2. Add Turmeric powder or food colour to the curd.
3. Mix all the ingredients in the marinate to the curd & put paneer, Tomato, capsicum & onion slices into the mixture. Let it marinade for 20 minutes.
4. Soak the skewers in water for 20 minutes.
5.Arrange the marinated paneer & other vegetables in the skewers.
6. Preheat your oven at 200* C. Arrange the skewers in the baking tray or the grill tray, bake for about 15 to 20 minutes. Brush some melted butter or oil on the tikkas in the middle of 10 minutes.

Note
You can add mushrooms & different colour bell peppers to add more colours to the skewers.
Sprinkle chat masala & lime juice. Serve Hot.
You can add garam masala as a substitute for chicken masala if it is not available in your pantry.
Potato Chickpea masala

I learnt this recipe from a malayali aunt in Hydrabad. During my stay in her house, she made it twice. It’s surely a keeper in my recipe book.
Serves – 5
Ingredients
Chickpeas- 1/2 cup soaked in water overnight
Onion- 2 No
Potato – 2No
Tomato – 2 No
Ginger – 1 inch
Coriander leaves- Few springs
Curry Leaves- few springs
Green chilly- 2no
sambhar Powder – 1tsp
chilli Powder- 1/4 tsp
Salt- To taste
For tampering
Dried Red chilly- 1
Mustard Seeds- 1/4 tsp
Urand Dhal- 1/4 tsp
Turmeric Powder- 1/4 tsp
Asafoetida- a pinch


Preparation
1. In a pressure cooker, heat oil, add mustard seeds, urand dhal allow it to crackle then add curry leaves, dried red chilly. Then add in the onion saute it till it turns translucent in colour, add turmeric powder & green chilli.
2. Slice the Ginger, smash it to release the aroma add it together with sliced tomatoes
3. Add in all the masalas ( chilli powder + sambhar powder+asafoetida)
4. Saute it for 5 minutes. Now add the potatoes , chickpeas & salt. Mix well.
5. Add 3/4 cup water & sprinkle coriander leaves generously.
6. Pressure cook for 1 whistle and 10 minutes in low flame
7. Garnish it with finely chopped coriander leaves.

Note:-
Soak the chickpeas in water overnight before using it in this recipe.
You can also make this masala without chickpeas too. Make sure to reduce the cooking time while making it without chickpeas.
If you are gonna make this only for a 2 person, just half the recipe.
It goes well with chapathi & poori
In the end i smashed the masala with the smasher. If you want you can skip this process.
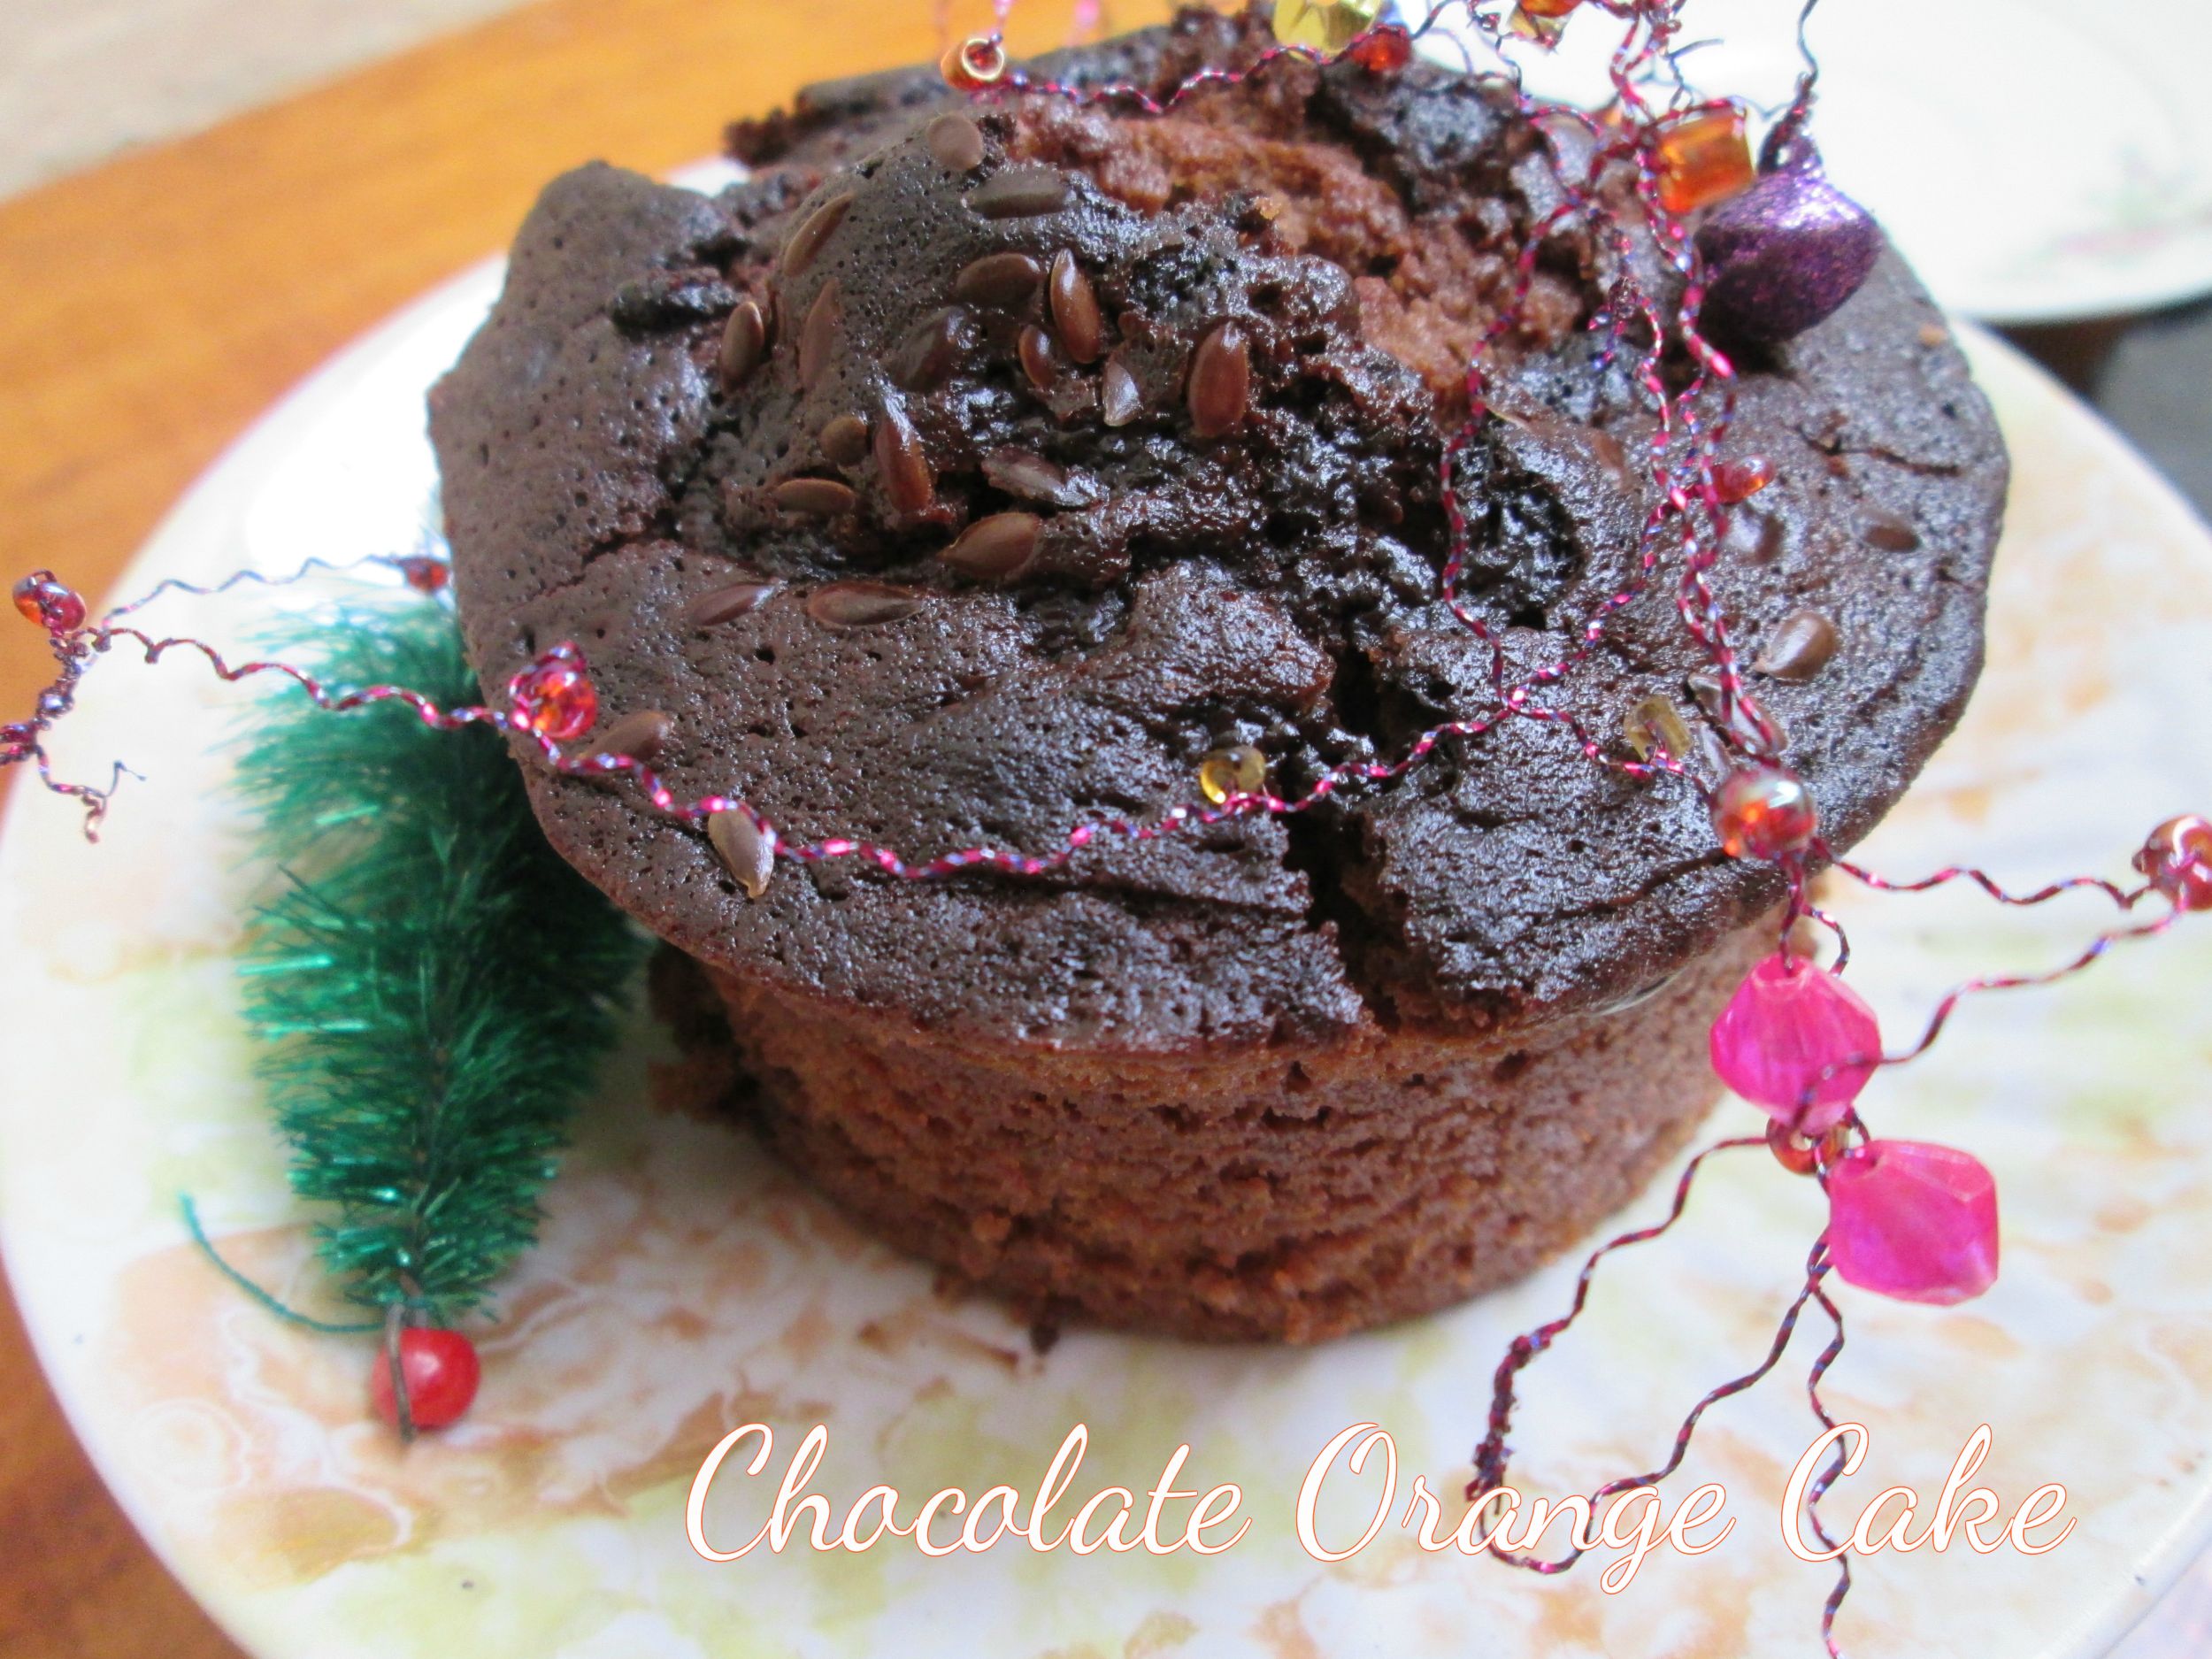
Chocolate Orange Cake
Happy New Year!
It’s been a while since I posted a new recipe. I was a bit busy with my exams. I am posting this Chocolate Orange Cake which I made for my sister, Alice. Chocolate & Orange is my all time favorite Combination. It’s more like I miss oranges in chocolates & chocolates in oranges. It’s sinfully delicious. Actually it’s an Orange flavored Chocolate cake.


Serves: 2
Ramekins- 2
Ingredients
All purpose Flour – 1/2 cup
Egg – 1 No
Baking Powder – 1/2 tsp
Salt- a pinch
Orange essence- 1/2 tsp
Sugar- 4 -5 tsp
Butter- 3tsp
Cocoa powder- 2tsp
chocolate chips- 4tsp
Flax seeds- 2tsp (optional)
Milk chocolate bar- 150 to 200 gms

Direction
1. Grease the Ramekins with butter.
2. Melt Butter & chocolate in a microwave.
3. Shift all purpose flour, baking powder, salt & cocoa powder.
4. Separate egg white & yolk in different bowls.
5. Whisk egg white with an electric blender, then beat in the sugar one at a time.
6.Add orange essence & yolk into the chocolate butter mixture & mix well.
7. Fold beaten egg white into the chocolate mixture.
8. Now add the dry ingredients along with the chocolate chips & mix well. Pour in the greased ramekins, top it with flax seeds.
9. Bake @ 160 c degree at 25 to 30 minutes or until a toothpick inserted in the center comes out clean.

My first attempt at Macarons

It’s always a dream for me to bake macaroons. Macaroons affair to India dates back to its Independence. Its all began when Portuguese sailors came to Tuticorin for trade used local labours for baking these wonderful macaroons. They used ground cashew nuts instead of Almond meal for making those macaroons bcz of their local availability. Macaroons are different from macarons, macarons are sandwich almond cookie made with meringue that comes with a variety of fillings. This is my first ever attempt in making macaron and I know it doesn’t look like the exact french macaron but it tastes pretty good.For a first attempt I am pretty happy with the outcome 🙂 . I adopted this recipe from Pooja Dhingra’s “Basic Macaron Shells” recipe with my own twist. I substituted the almond meal with ground cashew nuts. Indian version of Macaroons are made with cashew nuts and egg whites.

Ingredients
Powdered Sugar – 100gms
Ground cashew nuts – 100gms
Eggs whites – 70gms
castor Sugar – 65gms
Food colouring/ Badam Milk or Rose milk essence – 1/2 tsp
Direction
1. Sieve the powdered sugar and cashew nut powder so that there are no lumps.
2. Beat the egg whites in the electric mixture until it starts to froth, add in the castor sugar until you get firm peaks.
3. Now add in the flavour essence or food colouring.
4. Add in the cashew nut powder and sugar powder to the egg mixture. Use a spatula to mix till the batter flows freely.
5. Pipe this batter on to a baking tray lined with parchment paper/ butter paper. Set the tray aside for 30 to 40 minutes
6. Preheat the oven at 165C and bake it for 15 to 17 minutes. Cool completely before removing from the baking sheet.

I sandwiched these cookies with carrot halwa made with milk guava & grated carrots. You can use Nutella, lemon curd or make your own filling of your choice. Macarons taste best after 24 hours, sandwich the macaroons and store them in fridge overnight before eating them.
Note:
1. I used badam milk essence to the batter, it adds flavour as well as colour to the cookies.
2. If the macaron crust break on top it means that your oven temperature is too hot or you didn’t allow the batter to rest after piping in the tray.
3. It is important to tap the tray after piping as it helps to remove any air bubbles in there. This will prevent it getting a hollow shells after baking.

Carrot Cake
It has been raining all day. Rainy season has started. Even an ordinary leaf will look wonderful with a tiny raindrop on it. Everything is getting a new life in this monsoon, new sprouts are coming up in my rose plant stem 🙂 (in which I almost lost hope)

Mushrooms are sprouting in my garden. These mushrooms are the wonders of the monsoon season 🙂 .You can spot snails wandering through the garden only in this season.

Everyday there is a vendor selling mushrooms crosses my house every morning calling “mushrooms” 🙂 tats the call of a new day to me. I asked my friend karthika to take pictures of carrot from the market (I am a bit lazy 😳 ). This is her pics all the way from Bombay.

Thank u karthika for your wonderful pics ![]() . This is my favourite cake recipe. With rain, comes the appetite for rainy season snacks with the cup of chai. As I promised in the earlier post here is the recipe for the Carrot Cake. Normally I would try to take pictures in day light but this cake was baked during late evening. It deserves more than the way it looks. I don’t think i made enough justification to this picture. And I can promise you one thing after trying this recipe, You will make it again.
. This is my favourite cake recipe. With rain, comes the appetite for rainy season snacks with the cup of chai. As I promised in the earlier post here is the recipe for the Carrot Cake. Normally I would try to take pictures in day light but this cake was baked during late evening. It deserves more than the way it looks. I don’t think i made enough justification to this picture. And I can promise you one thing after trying this recipe, You will make it again.

Serves- 9 to 10 slices
Ingredients
ALP / maida – 1& 1/4 cup
Carrot – 1/2 cup grated
Baking Powder – 1/2 tsp
Baking Soda – 1/2 tsp
Salt- a pinch
Egg- 3 no
Ground cinnamon – 1/2 tsp
granulated Sugar – 3/4 cup
Ghee or vegetable oil – 1/2 cup
vanilla essence – 1tsp

Directions:
1. Combine the flour, baking soda, cinnamon, baking powder and salt.
2. Beat the sugar, oil/ghee, vanilla and eggs in bowl.
3. Mix the dry ingredients to the wet ingredients.
4. Fold in the grated carrots. In this stage, you can add raisins, walnuts or any other nuts which is optional.
5. Pour the cake batter in a greased 7 inch square pan.
6.Bake it in a preheated oven at 180 C for 25 to 30 minutes or until a toothpick inserted in the center comes out clean.

Homemade Pizza

It’s been raining all day long and all i want to do is bake something. Monsoon season has started. I am in the baking mood today. I have gone over all the recipe list in my Evernote (I use Evernote to save recipes from other blogs & website, such a clever app 😉 ) and just can’t decide which recipe to make. Finally I ended up making Pizza. I promised my friend I would post carrot cake recipe but i delayed that post due to not having enough pics. My next post would be moist & delicious carrot cake recipe ![]()

Here are the easy steps for making best homemade pizza for the pizza lovers 🙂
Makes
One large pizza or Three Medium sized pizzas
Ingredients
For the dough
All Purpose Flour- 2 Cup
Yeast- 11/2 tsp
Milk- 1/2 cup
Water- 1 cup
Salt- 1/2 tsp
Olive oil- 1/4 cup

For the Topping
Pizza Sauce or any home made sauce- 3-4 tsp
Onion- 1no
Capsicum- 1/2, Sliced
Salt- 1/4 tsp
crushed pepper- 1/2 tsp
Any kind of cheese- for the topping
Preparation
1. Dissolve the yeast in warm milk & sugar mixture and keep aside for 15 minutes.Then add olive oil to that mixture.
2. Add salt to the flour and mix well.
3. Now add the yeast mixture to the flour and add warm water to make it a smooth dough.
4. Cover it with the kitchen towel & let it rise for one hour.
5. Generously flour your working area and roll out the dough into a round shape. Grease your pizza pan with oil & dust it with flour. Place the dough in the pan & fold the end.

6. Spread the sauce all over the base.

7.Toss the toppings in olive oil, salt & pepper

8. Arrange the toppings as desired & spread cheese to cover the toppings.

9. Bake in a preheated oven at 200C for 15 to 20 minutes until the crust turns into golden in colour.
10. Serve it with grated cheese & dipping sauce.
Note
For the sauce, you can use any store bought pizza sauce or ketch up. In this recipe i used a basic home made tomato sauce. In a pan, add oil & diced tomatoes, fry until the tomatoes turn mushy. Then add in the chilli powder, basil leaves, chilli flakes & salt.
Make sure the milk & the water is not too much hot otherwise it will kill the yeast. It has to be warm enough to touch.
Banana Bread

I never had the habit of drinking Tea until i get the first sip of my office chai wallah’s Tea. I remember so well the strong heady aroma that gripped my taste buds. His Chai is filled with the aroma of green cardamom & ginger. Now i am a happy tea lover 🙂

Tea plantation in ooty.

Doddabetta Tea factory, at connor.
This is the place where they show how they produce tea. The Tea factory sells all type of tea cardamom tea, ginger tea & green tea etc etc..They give us a sample of tea to taste, to tell you the truth it tastes heavenly. Their product didn’t taste good when we try it in our home.My advise is just watch the process, don’t get over excited to buy their product.But it is worth the visit to see those process.You can get a glimpse of the whole process of preparing a tea, starting from the plucked leaf to the rolling, drying & shifting stages until the tea grains are poured into the jute bags that came for retail sale.


A nice cup of tea & a sit down chat will relieve all the day stress 🙂
Banana Bread is my favourite recipe. This one is fool proof, no way you can go wrong with this one.

Serves- 4-5
Ingredients
Banana – 2 no
All purpose flour/ maida – 1 cup/200gms
Corn flour- 1/4 cup/ 50 gms
Egg- 1no
Baking Powder – 1tsp
Baking soda – 1/2 tsp
salt- a pinch
Sugar – 1/2 cup
melted Butter/ Ghee- 1/2 cup
vanilla essence- 1 tsp

Preparation
1. Mash the bananas, add one egg and vanilla essence to the mashed bananas.
2. Whisk together the melted butter / ghee and sugar.Whisk until completely combined and the mixture is smooth.
3. Sieve all purpose flour, corn flour, Baking powder,soda & salt in a bowl.
4. Mix the dry ingredients to the wet ingredients. You can add milk to adjust the batter consistency.
5. Pour the batter in the greased loaf pan. Bake in a preheated oven at 180*c for 30 to 35 minutes, until it is golden in colour.
Slice & serve it with a cup of Spiced Tea 🙂

Note: If you don’t have corn flour replace it with all purpose flour or whole wheat flour.
Ripe Bananas are the key to make a great banana cake.
You can add in some chopped nuts or chocolate chips to the batter which is optional.
